When water damage strikes your Greater Los Angeles property, knowing who to call for water damage quickly determines whether you face manageable repairs or devastating losses. Water emergencies require immediate professional response to prevent structural deterioration, mold contamination, and escalating restoration expenses. Whether dealing with burst pipes, fire suppression water, roof failures, or plumbing malfunctions, contacting qualified water damage restoration specialists within the first 24 hours is critical for protecting your property throughout Lake Los Angeles, El Mirage, Adelanto, Victorville, Apple Valley, Hesperia, Lucerne Valley, San Bernardino, Pomona, Lytle Creek, Crest Line, Claremont, Rancho Cucamonga, Fontana, and Colton.
Despite Southern California’s reputation for dry weather, water damage remains a serious threat once water enters your building.
Water damage emergency? Contact Coast View Plumbing & Restoration immediately for 24/7 professional water damage restoration throughout Greater Los Angeles.
Why DIY Water Damage Cleanup Fails
Many property owners consider handling water damage cleanup themselves, but this approach typically results in incomplete restoration and long-term damage that costs significantly more than professional services.
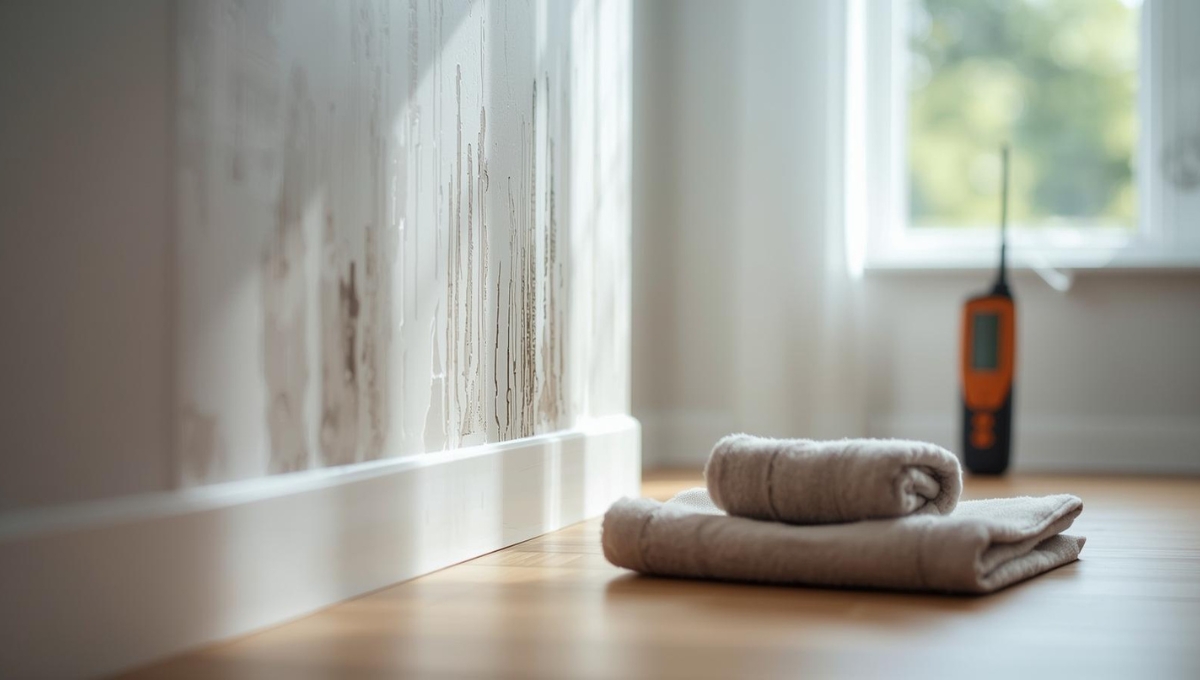
Water damage extends far beyond visible surface water. Water infiltrates wall cavities, penetrates beneath flooring, and saturates insulation in ways that aren’t apparent without specialized detection equipment. Household fans and consumer dehumidifiers cannot generate the drying power necessary for thorough structural moisture removal.
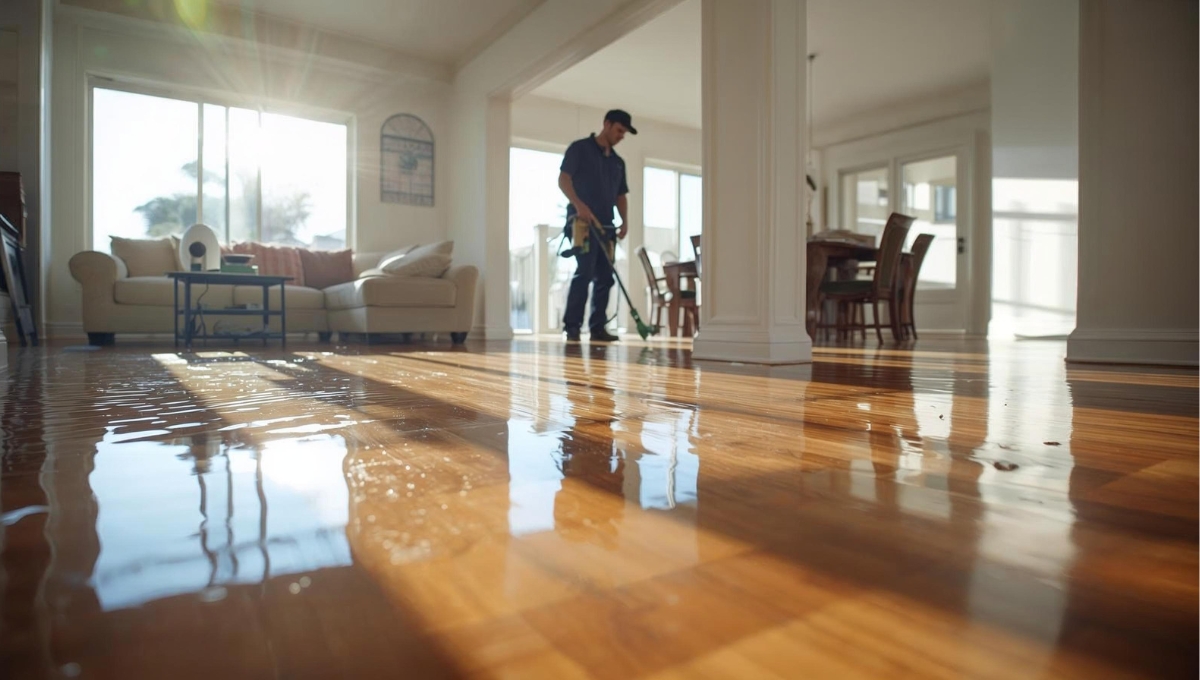
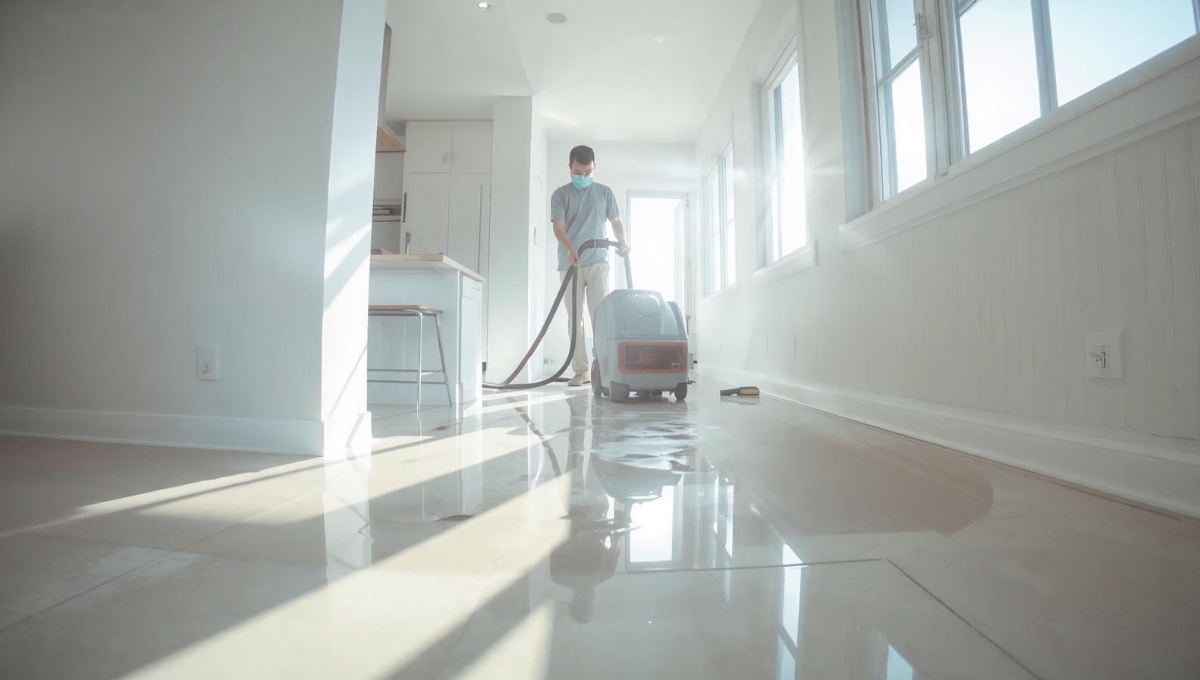
Professional restoration companies deploy industrial equipment designed specifically for water damage. Truck-mounted water extractors remove standing water in minutes. Commercial-grade dehumidifiers process 150 to 200 pints of moisture daily, while consumer units handle only 30 to 50 pints. High-velocity air movers create focused airflow that accelerates evaporation.
Moisture detection technology allows professionals to identify hidden water accumulation. Infrared thermal imaging cameras visualize temperature differences indicating moisture presence behind walls and above ceilings. Moisture meters measure exact moisture content in materials.
Professional restorers understand that different materials require different drying approaches, preventing both inadequate drying that enables mold growth and aggressive approaches that cause unnecessary damage. Insurance claim support represents another crucial advantage, as restoration companies document damage thoroughly and advocate for appropriate settlements.
Emergency Situations Requiring Immediate Professional Response
Certain water damage scenarios pose such serious risks that professional intervention cannot be delayed.
Critical Emergencies Demanding Immediate Action:
- Category 3 Contaminated Water: Sewage contact or water from outside flooding contains dangerous pathogens requiring specialized cleanup protocols.
- Significant Water Volume: Standing water exceeding two inches depth requires professional truck-mounted extraction systems.
- Unknown Water Sources: Water appearing without clear origin indicates hidden failures requiring professional diagnosis.
- Structural Safety Concerns: Sagging ceilings, buckling floors, and bowing walls indicate dangerous structural compromise.
- Electrical System Contact: Water near electrical panels or components creates serious electrocution hazards.
- Fire Suppression Water Damage: Water used to extinguish fires mixes with soot and chemicals, creating contamination requiring specialized cleanup.
Identifying Qualified Water Damage Restoration Professionals
When emergency strikes, several key factors distinguish qualified professionals.
Essential Professional Qualifications:
- True 24/7 Emergency Availability: Round-the-clock staffing and rapid dispatch
- Regional Presence: Companies operating throughout Greater Los Angeles arrive faster
- Complete Licensing and Insurance: Verify California contractor licenses and comprehensive coverage
- Industry Certifications: IICRC certification and ongoing technician training
- Advanced Equipment Investment: Modern equipment fleets indicate commitment to effective restoration
- Insurance Industry Experience: Proven track record working with major carriers
- Comprehensive Service Offerings: Complete services from emergency extraction through final reconstruction
Professional Water Damage Restoration Process Overview
Understanding proper restoration procedures helps you evaluate whether companies follow industry-standard protocols.
Complete Restoration Process:
- Emergency Contact and Dispatch: Professional companies dispatch fully-equipped technicians immediately, typically arriving within one to two hours.
- Comprehensive Inspection: Technicians conduct thorough assessments, identifying water sources, classifying contamination levels, and evaluating damage extent.
- Rapid Water Extraction: Using powerful extraction systems, professionals remove standing water quickly.
- Moisture Detection: Advanced equipment creates detailed moisture maps with monitoring protocols tracking progress.
- Structural Drying Operations: Industrial dehumidifiers and air movers operate continuously for three to seven days.
- Thorough Cleaning and Sanitization: Comprehensive cleaning removes contaminants, antimicrobial treatments address concerns, and deodorization eliminates odors.
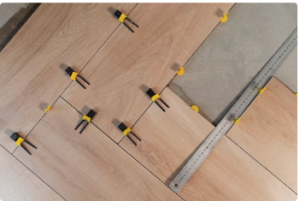
- Complete Restoration: Final phase includes repairs from minor tasks to major reconstruction.
Greater Los Angeles Water Damage Challenges
Properties throughout Greater Los Angeles face unique water damage risks related to geography and climate variations.
Earthquake vulnerability creates water damage risks beyond those in other regions. Seismic activity can rupture water lines, damage plumbing connections, and compromise building waterproofing. Properties require restoration professionals who understand seismic considerations.
Climate diversity across Greater Los Angeles creates varied water damage scenarios. Desert communities like Lake Los Angeles and El Mirage experience extreme temperature fluctuations stressing plumbing systems. Mountain communities including Crest Line face winter freeze risks. Inland areas deal with intense summer heat affecting roofing systems.
Fire suppression water represents a unique concern in fire-prone Southern California. Firefighting efforts introduce substantial water volumes that mix with soot, ash, and fire retardant chemicals, requiring specialized restoration approaches.
Older infrastructure includes properties with aging plumbing systems, outdated roofing, and deteriorating waterproofing that fail more frequently.
Frequent Water Damage Causes
Understanding common water damage sources helps property owners recognize problems early.
Common Water Damage Sources:
- Burst pipes from pressure surges or age-related failures
- Failed water heater tanks flooding properties
- Roof leaks from deteriorated materials
- Fire sprinkler activations and firefighting water
- Washing machine supply hose failures
- Slab leaks from underground plumbing
- HVAC condensate line clogs
- Dishwasher and refrigerator line failures
- Flash flooding during intense rainfall events
Each scenario presents unique challenges requiring professional expertise.
Advantages of Local Restoration Specialists
When water damage occurs, local restoration companies offer significant benefits.
Response time proves critical. Each hour water contacts building materials increases damage severity and costs. Local companies dispatch technicians from nearby locations, arriving within one to two hours. This rapid response prevents damage progression and can save thousands.
Regional expertise provides invaluable advantages. Companies operating throughout Greater Los Angeles understand diverse challenges across communities. They’re familiar with local building types, construction methods, regional codes, and insurance providers.
Community accountability drives exceptional service. Local businesses build reputations on neighbor satisfaction. Their success depends on providing excellent service that generates referrals.
Coast View Plumbing & Restoration exemplifies these local advantages, serving communities throughout Greater Los Angeles with deep regional roots, immediate response capabilities, and comprehensive restoration expertise.
Important Questions Before Hiring
Before committing to any restoration company, ask critical questions revealing their capabilities.
Essential Pre-Hiring Questions:
- How quickly can you respond to my location?
- What certifications do your technicians possess?
- Do you employ your own crews or subcontract?
- Will you handle insurance claims coordination?
- What specific equipment will you use?
- Can you provide recent customer references?
- Do you offer complete restoration services?
- What warranties do you provide?
Professional companies answer these questions thoroughly and demonstrate expertise.
Financial Impact of Delaying Professional Restoration
Property owners sometimes postpone calling professionals, but this delay invariably increases total expenses.
Water damage spreads continuously. Initial damage confined to one area migrates to adjacent spaces as water seeps through materials. Each hour of delay expands the affected area substantially.
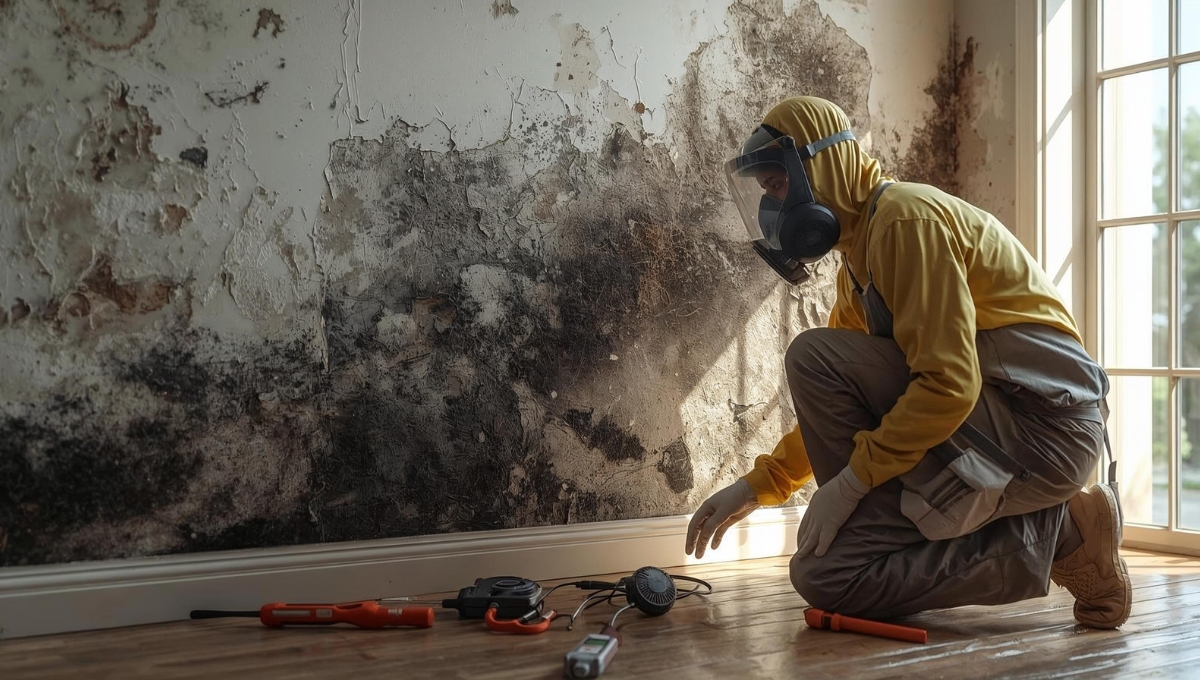
Mold colonization becomes probable within 24 to 48 hours. Once mold establishes colonies, remediation requires specialized containment, material removal, antimicrobial treatment, and verification testing, far exceeding early water extraction expenses.
Material deterioration accelerates continuously while moisture persists. Wood framing begins rotting, drywall becomes soft, flooring adhesives fail, and subflooring delaminates. Materials potentially salvageable through immediate drying require complete replacement after prolonged exposure.
Insurance coverage complications arise from delayed mitigation. Property insurance policies require policyholders to prevent additional damage through reasonable prompt action. Days of delay can provide insurers justification for claim denials or reductions.
Actions to Take Before Professional Arrival
After contacting professional restoration services, several immediate steps help minimize ongoing damage.
Stop water flow immediately if possible by shutting off water supply at the source or main valve. Document existing damage comprehensively using photographs and videos. Remove valuable items including furniture, electronics, and important documents from affected areas if you can do so safely.
Place aluminum foil or plastic barriers under furniture legs remaining on wet flooring. Open doors to closets and cabinets, improving air circulation. Wipe excess water from furniture surfaces to prevent finish damage.
Never enter areas presenting electrical hazards, structural safety concerns, or sewage contamination. These dangerous situations require professional equipment and expertise.
Securing Professional Help Throughout Greater Los Angeles
When water damage threatens your Greater Los Angeles property, immediate professional response protects your investment and prevents long-term problems. Knowing who to call for water damage eliminates dangerous delays and ensures expert restoration.
Professional water damage restoration demands specialized knowledge, commercial-grade equipment, and rapid response capabilities that DIY approaches cannot provide. Attempting to handle significant water damage yourself or delaying professional help leads to increased expenses, extensive deterioration, and potential health hazards.
Selecting the right restoration company matters tremendously. Local specialists understanding Greater Los Angeles’s unique challenges across diverse communities, responding immediately to emergencies, and providing comprehensive services deliver the best outcomes.
Don’t let water damage destroy your property or compromise your family’s health. Contact Coast View Plumbing & Restoration today for immediate professional water damage restoration services throughout Greater Los Angeles.


 Here are the steps you can follow to Water-Damaged Ceiling